Projects
Create a project when work needs ongoing context.
Overview
Projects are dedicated workspaces for ongoing work — each project can hold its own instructions, reference files, and chats so everything stays aligned to one goal. Use a project when you work on the same initiative for weeks and do not want to repeat background in every message. Open the project from the sidebar and chat inside that workspace so answers follow the project instructions and files you attached.
End-to-end flow
A simple path to follow:
Sidebar → Projects → Click Create Project → Enter name and instructions → Next → Upload files if needed → Create → Open the project chat workspace → Attach files or folders as needed
How it works
Instructions:
Project instructions tell the assistant how to behave for this initiative — tone, format, and rules you would otherwise paste into every chat. Project name — 100 characters. Project instructions — 8,000 characters.
Attach in a project:
Inside a project, click Attach and choose Upload Files or Upload Folder. Upload Files accepts supported file types only. Upload Folder uploads supported files from the folder and skips the rest.
Documents in chat:
When you ask JioAI Assistant to create a document inside a project, that document is saved and attached to the project automatically. Later chats in that project use it as context.
Share a chat:
In the project's recent chats list, you can share a particular chat.
Settings later:
Open project Settings anytime to update the name, instructions, files, or delete the project.
Tip:
Write clear project instructions once at the start — who the audience is, how to format answers, and what sources to prioritise — and update them when the initiative changes.
Walkthrough
1. Create Project — name and instructions
Click Create Project, enter a Project Name (up to 100 characters), and add instructions that set context for how JioAI should respond in this project.
Click Next when name and instructions look right. You can refine instructions later in Settings.
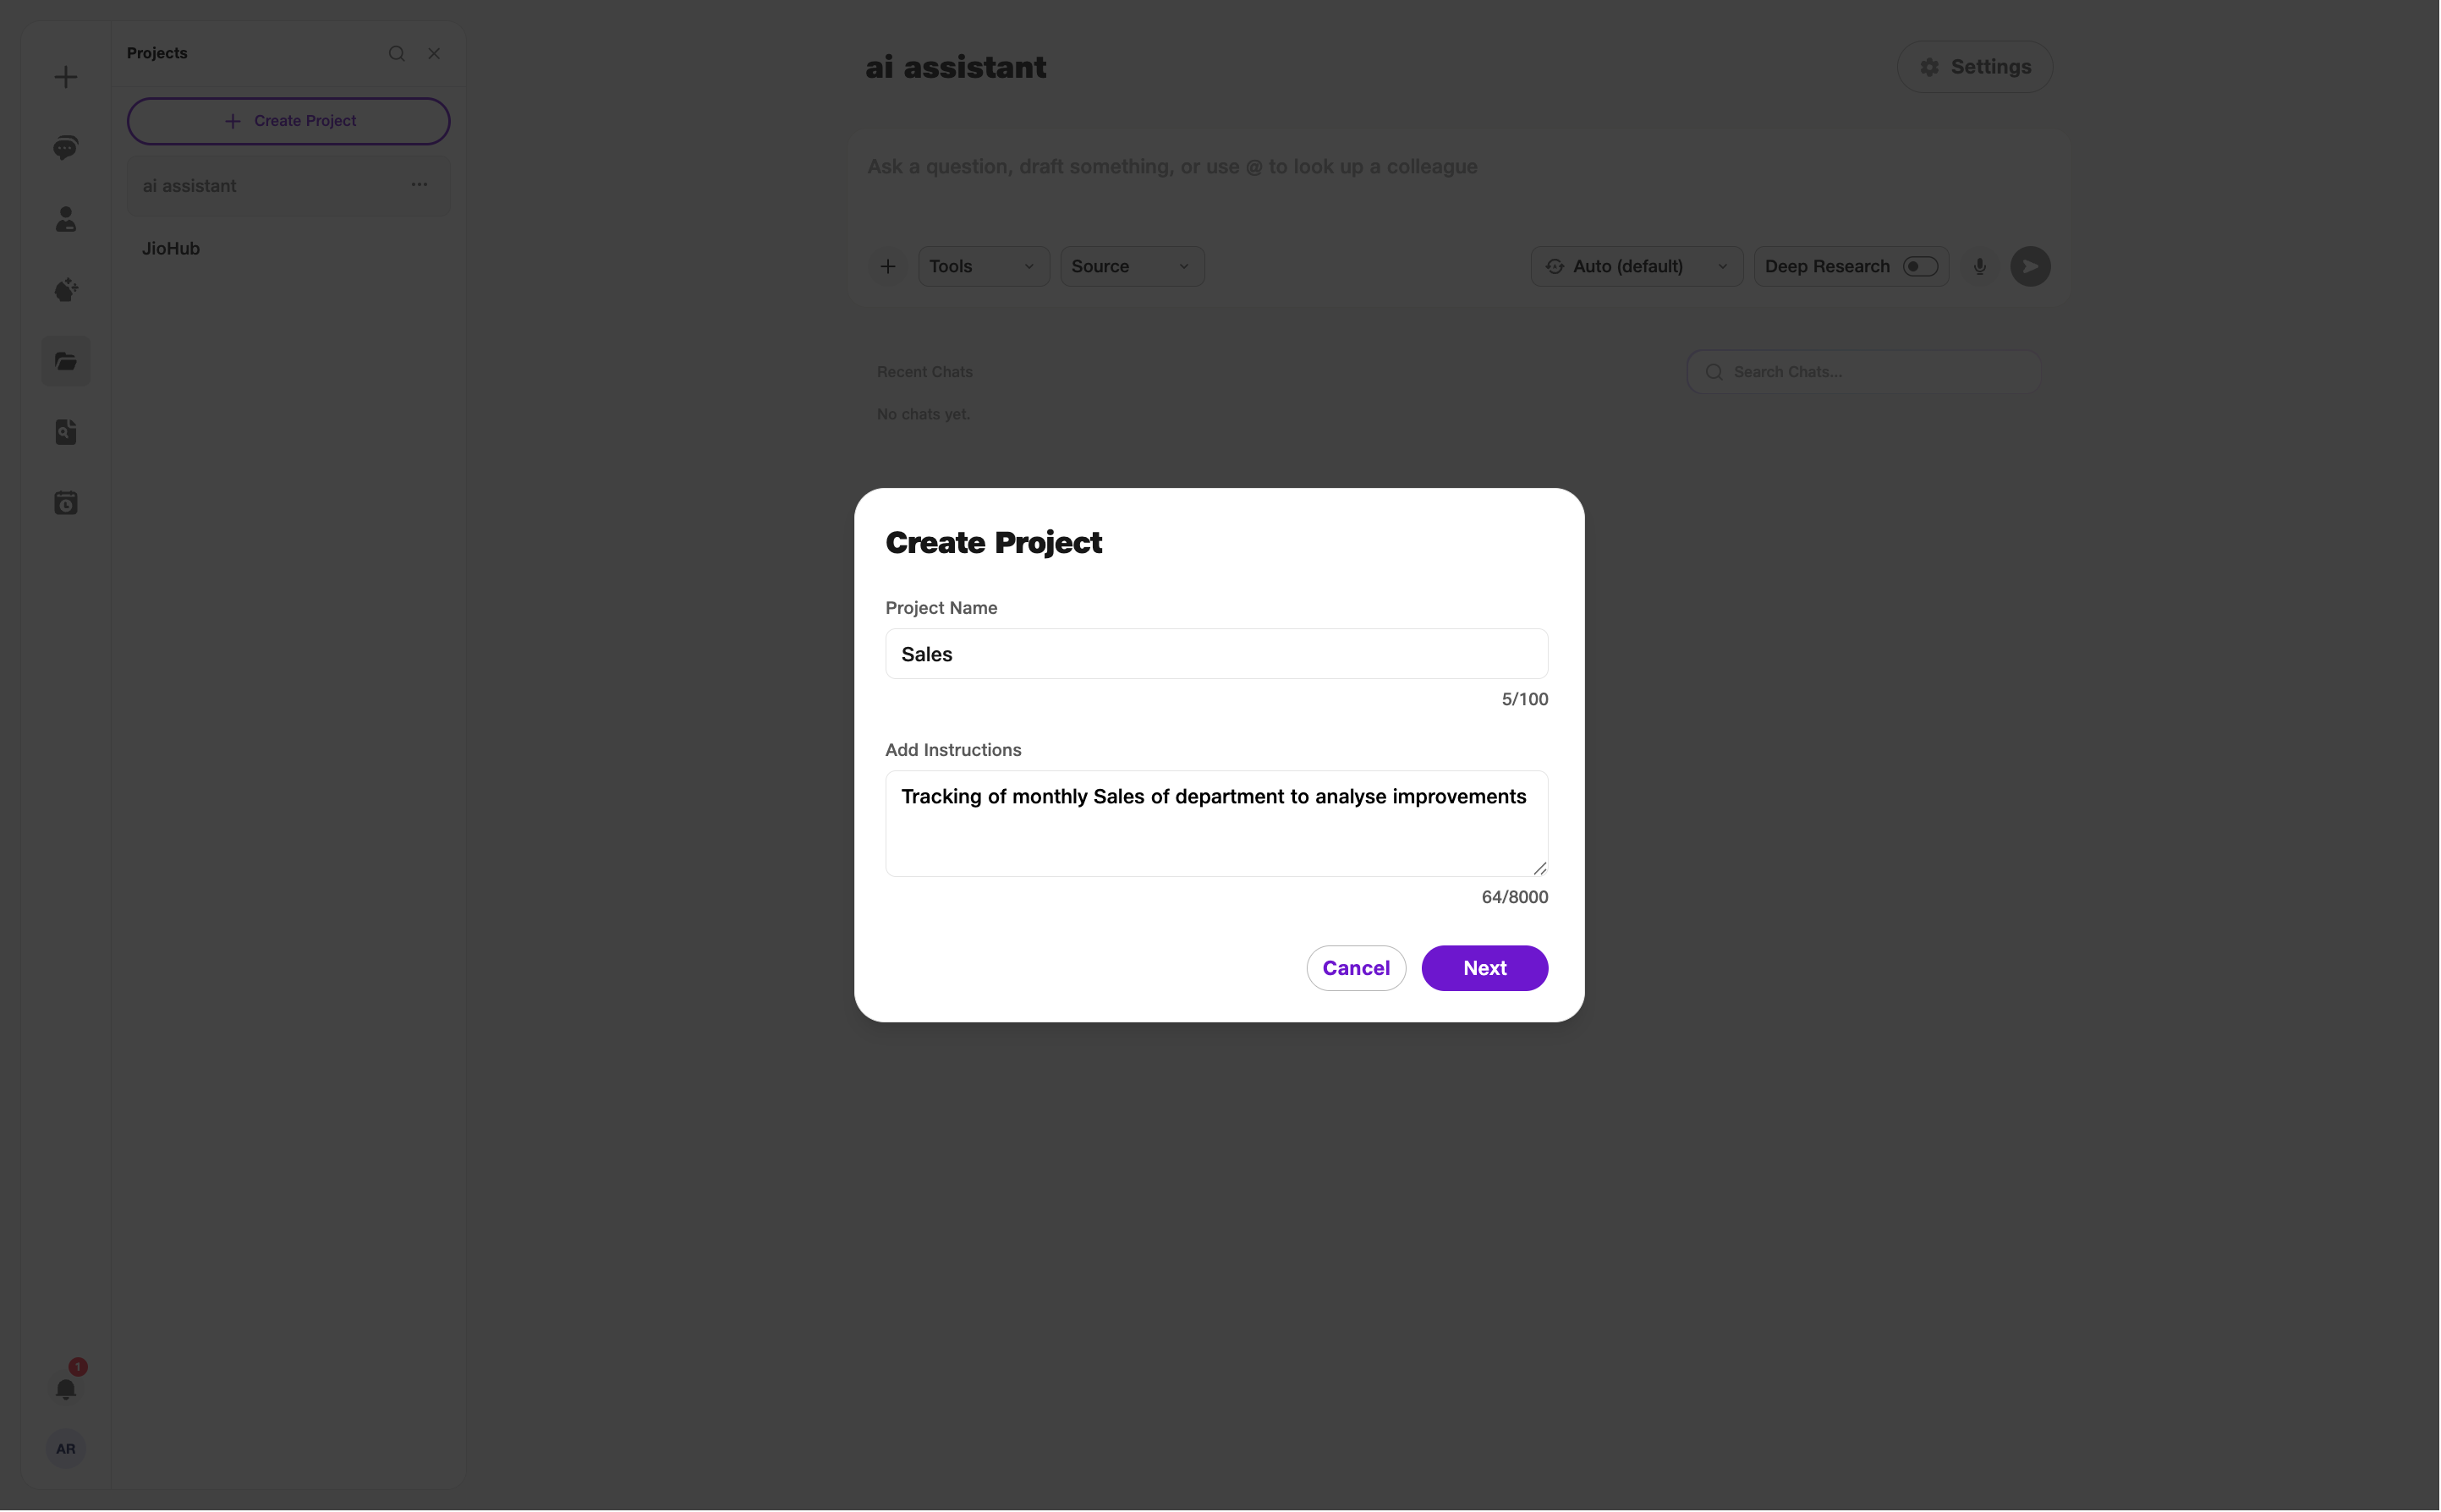
- Project Name: Up to 100 characters.
- Instructions: Up to 8,000 characters.
2. Create Project — add files
On the Add Files step, upload reference files for the project, then click Create.
Limits: max 7 files per upload, 100 MB per file, unlimited total files per project. Remove a file with the X if you picked the wrong one.
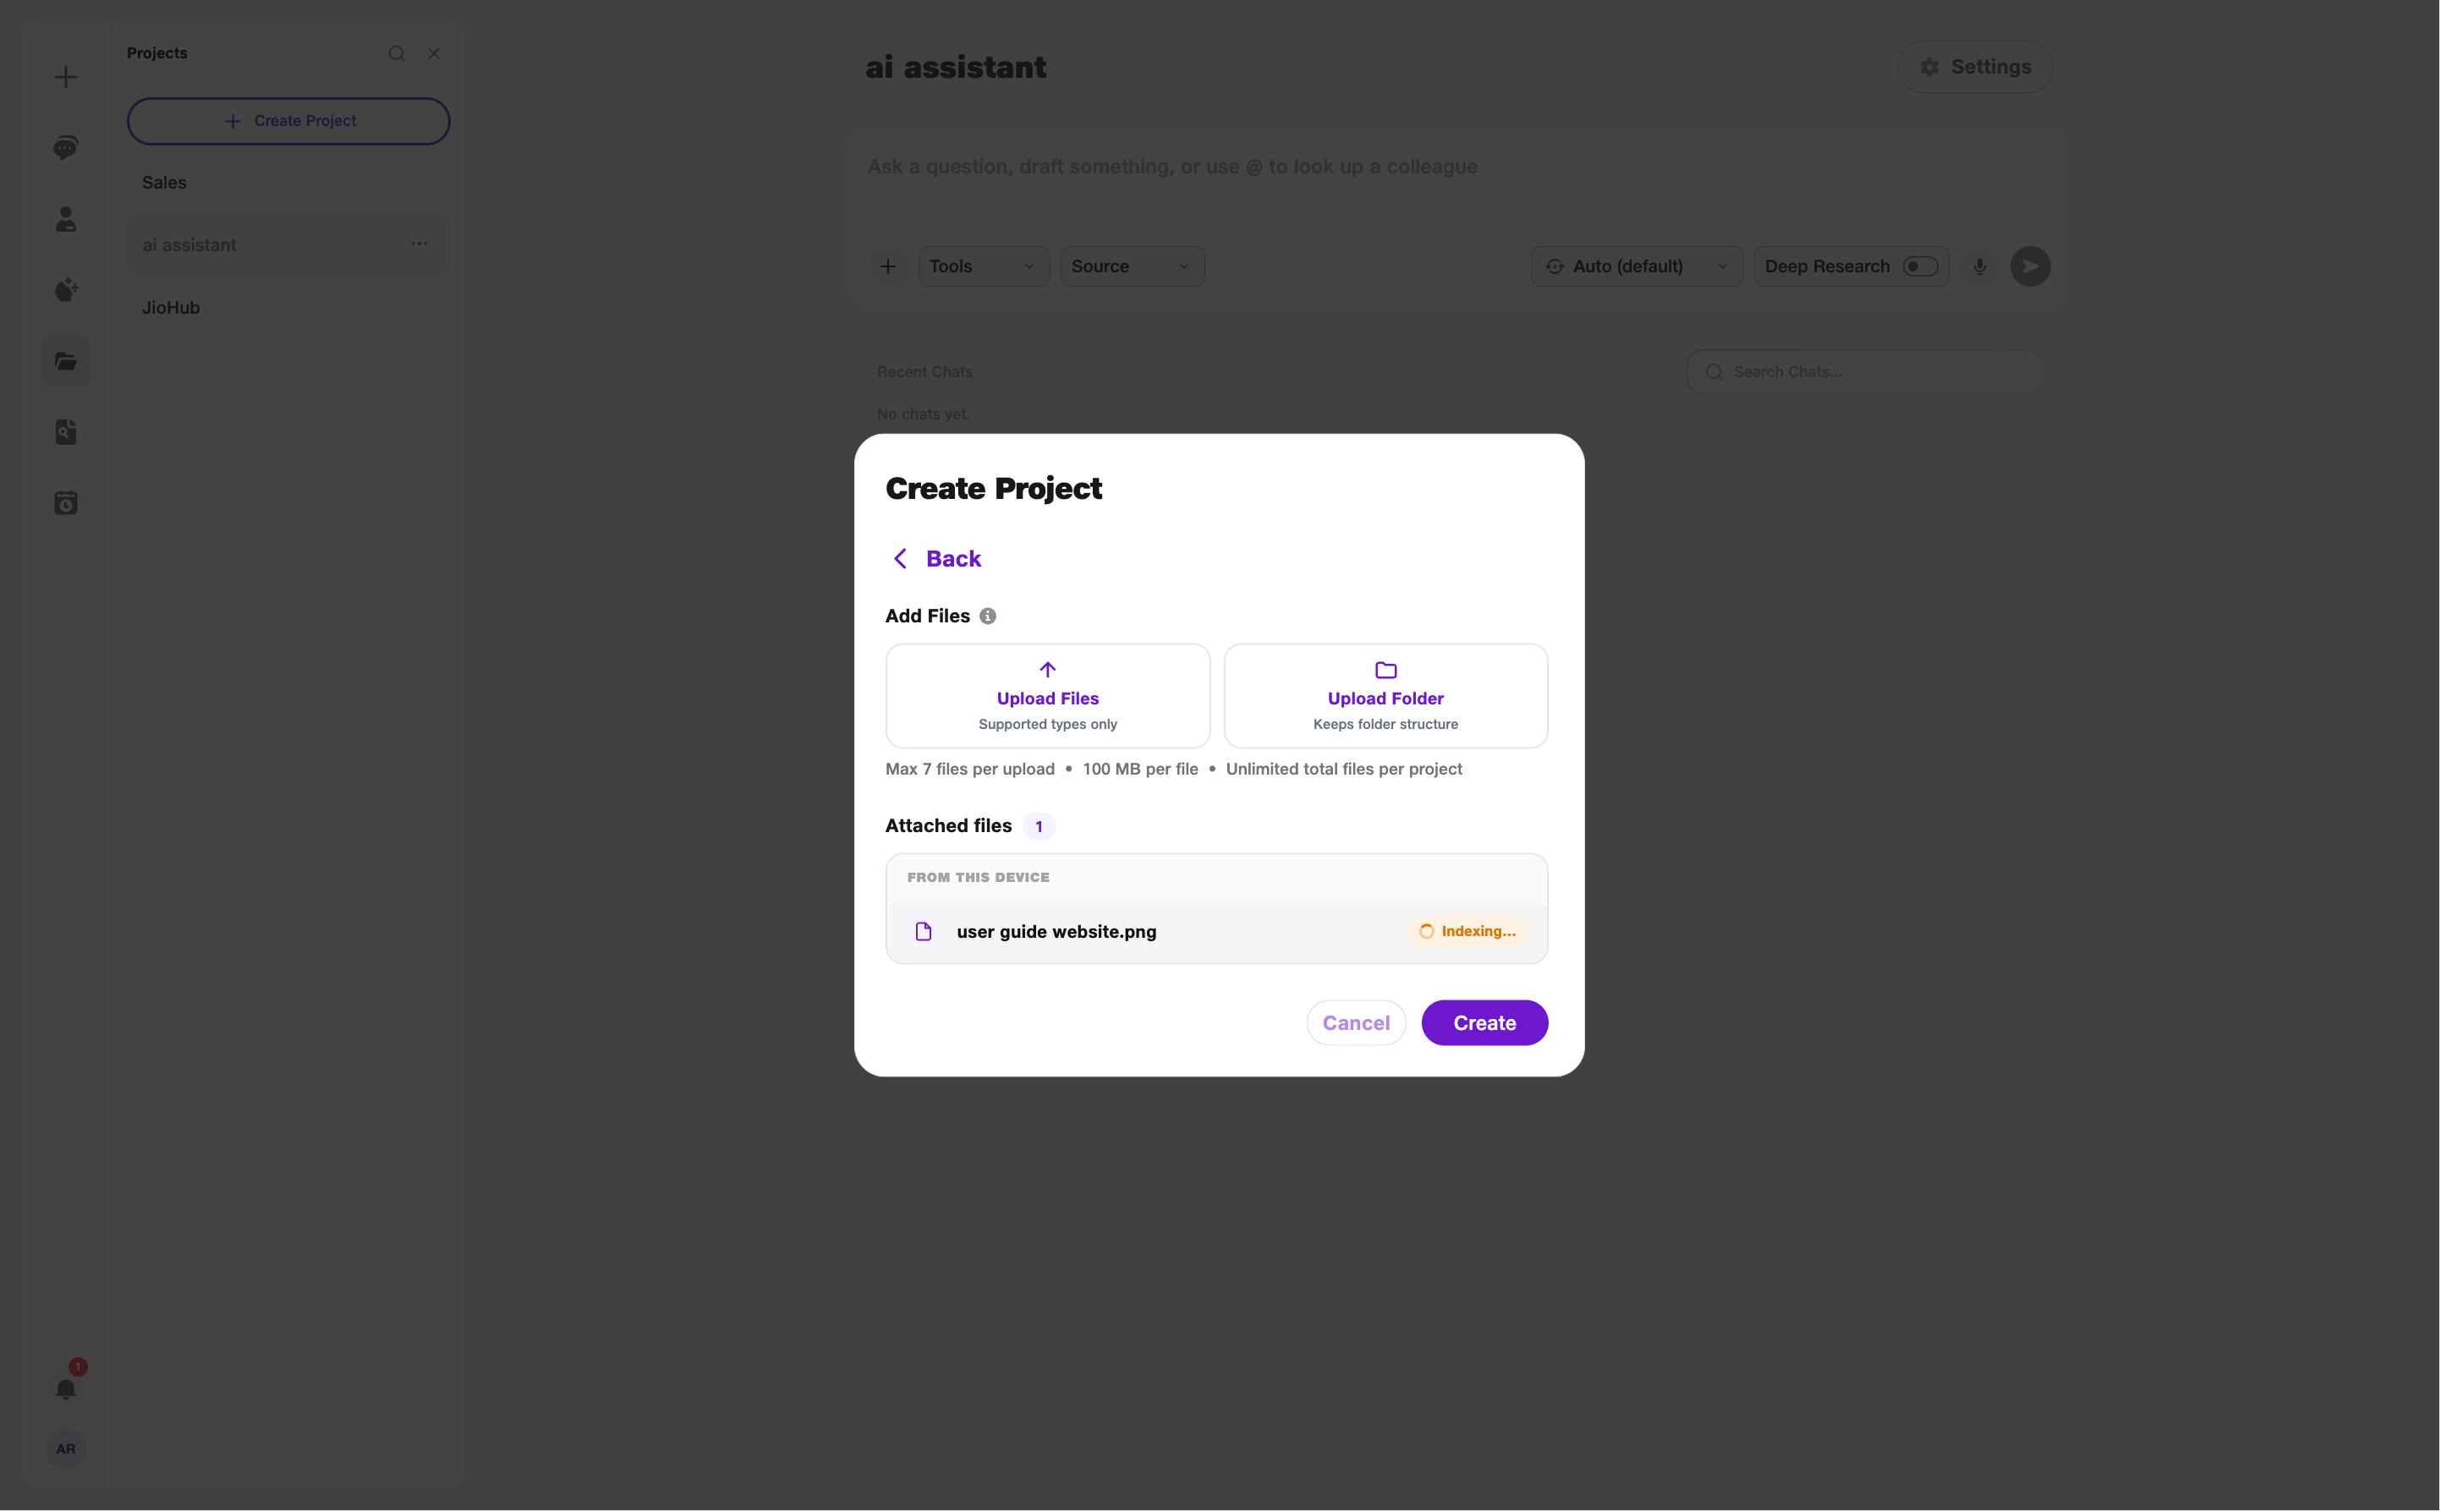
- Upload Files: Add project references.
- Limits: 7 files / 100 MB each.
3. Attach files in a project
Inside a project, click Attach and choose Upload Files or Upload Folder.
Upload Files accepts supported file types only. Upload Folder uploads supported files from the folder and skips the rest — you see how many were selected and how many were skipped. If nothing is supported, you see No supported files found in this folder.
- Upload Files: Pick individual supported files.
- Upload Folder: Upload supported files from a folder.
4. Documents and recent chats
When you ask JioAI Assistant to create a document in a project, it is saved and attached to that project automatically.
Later chats in the project use that document as context. From the project's recent chats list, you can share a particular chat.
- Auto-attach: Created documents stay with the project.
- Share chat: Share a chat from recent chats.
5. Project Settings
Inside a project, open Settings to update the name, instructions, and files, or delete the project.
Upload more files anytime under the same limits. Click Update to save changes.
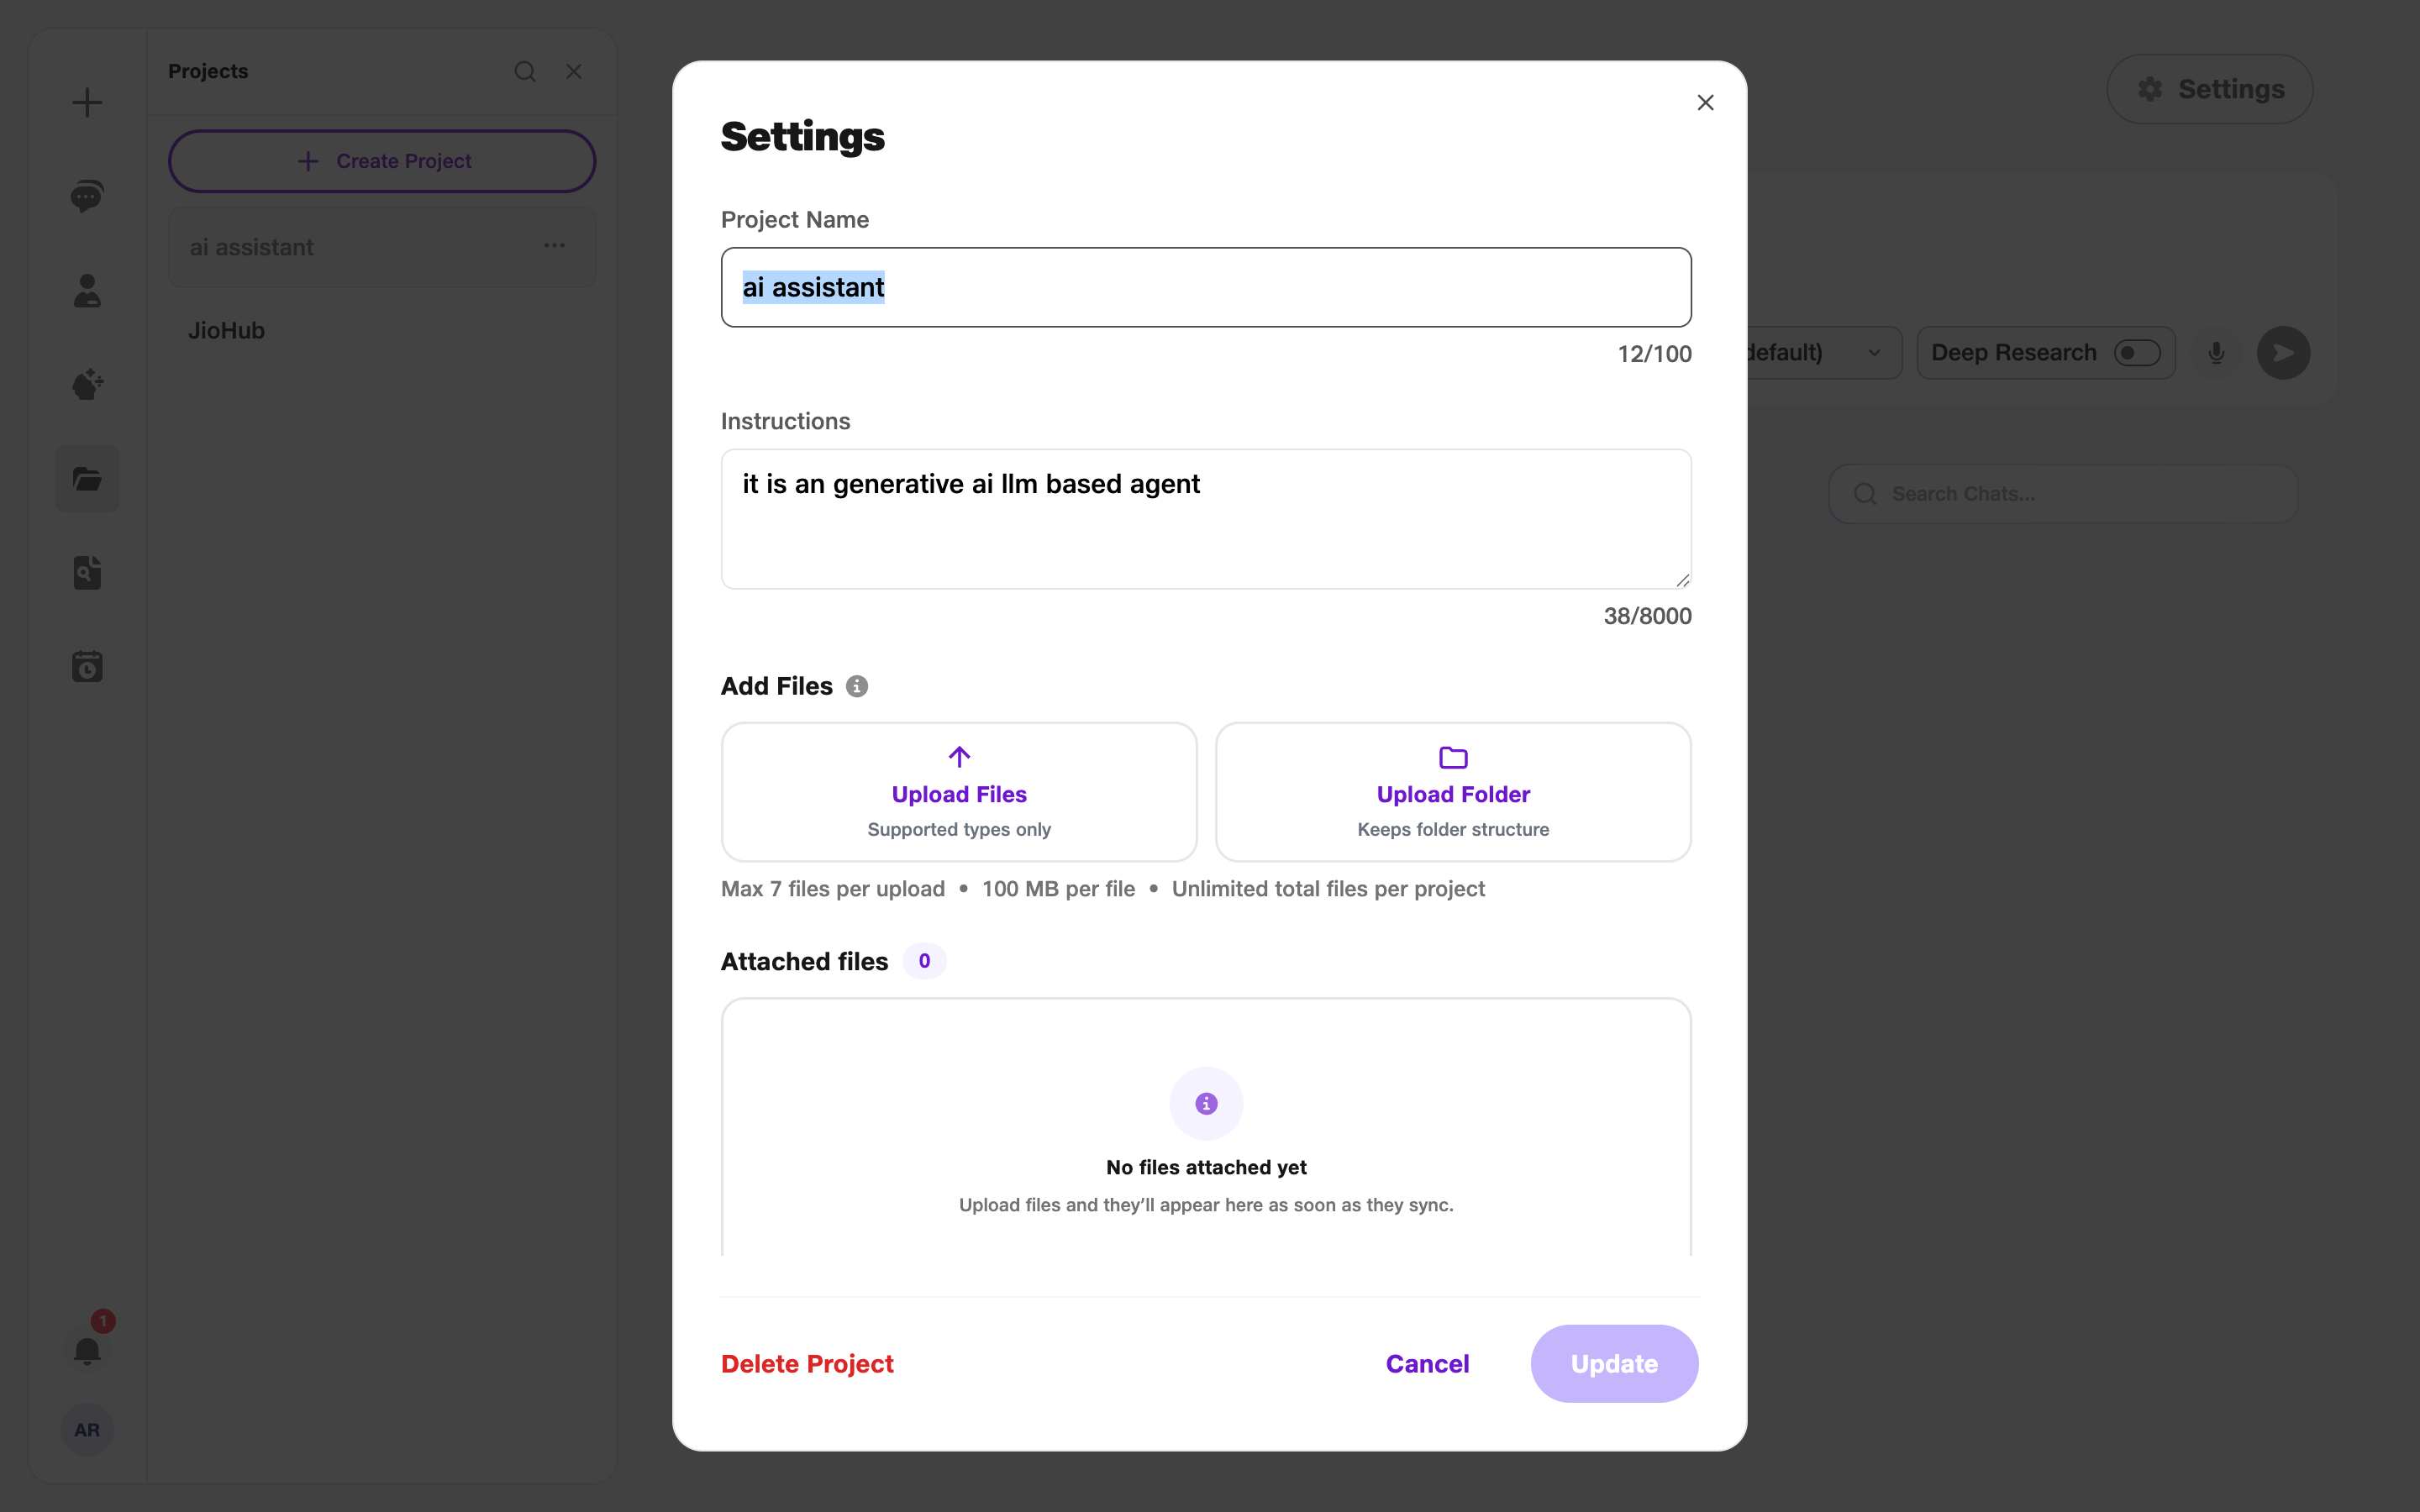
- Settings: Edit project details.
- Delete Project: Remove when no longer needed.