Schedule Meeting
Ask the assistant to find a time and send a calendar invite.
Overview
Schedule Meeting helps you create calendar invites by describing who should join, when you want to meet, and what the meeting is about — in everyday language instead of clicking through calendar forms. Use it when you need a quick sync, a review call, or a recurring check-in. When your calendar is connected, the assistant can propose a time and prepare an invite for you to confirm before it goes out.
End-to-end flow
A simple path to follow:
Open Tools → Select Schedule Meeting → Describe attendees, preferred date/time, duration, and topic → Send → Review the proposed slot and invite details → Confirm or ask to adjust → Check your calendar for the final invite
How it works
Calendar access:
Scheduling works best when your calendar connector is set up in Account → My Connectors — without it, the assistant may only draft text for you to paste manually.
Be clear:
Include people’s names or emails, how long the meeting should be, and the subject so the invite is useful the first time.
Confirm:
Always read the proposed time and attendee list before confirming — you stay responsible for what actually lands on everyone’s calendar.
Tip:
Example: “Schedule 30 minutes tomorrow afternoon with Priya and me about the release checklist” — add timezone if your team spans regions.
Walkthrough
1. Select Schedule Meeting
In chat, open the Tools menu and choose Schedule Meeting so the assistant uses your scheduling workflow for this request.
If calendar features seem limited, open Account → My Connectors and make sure Calendar is connected before trying again.
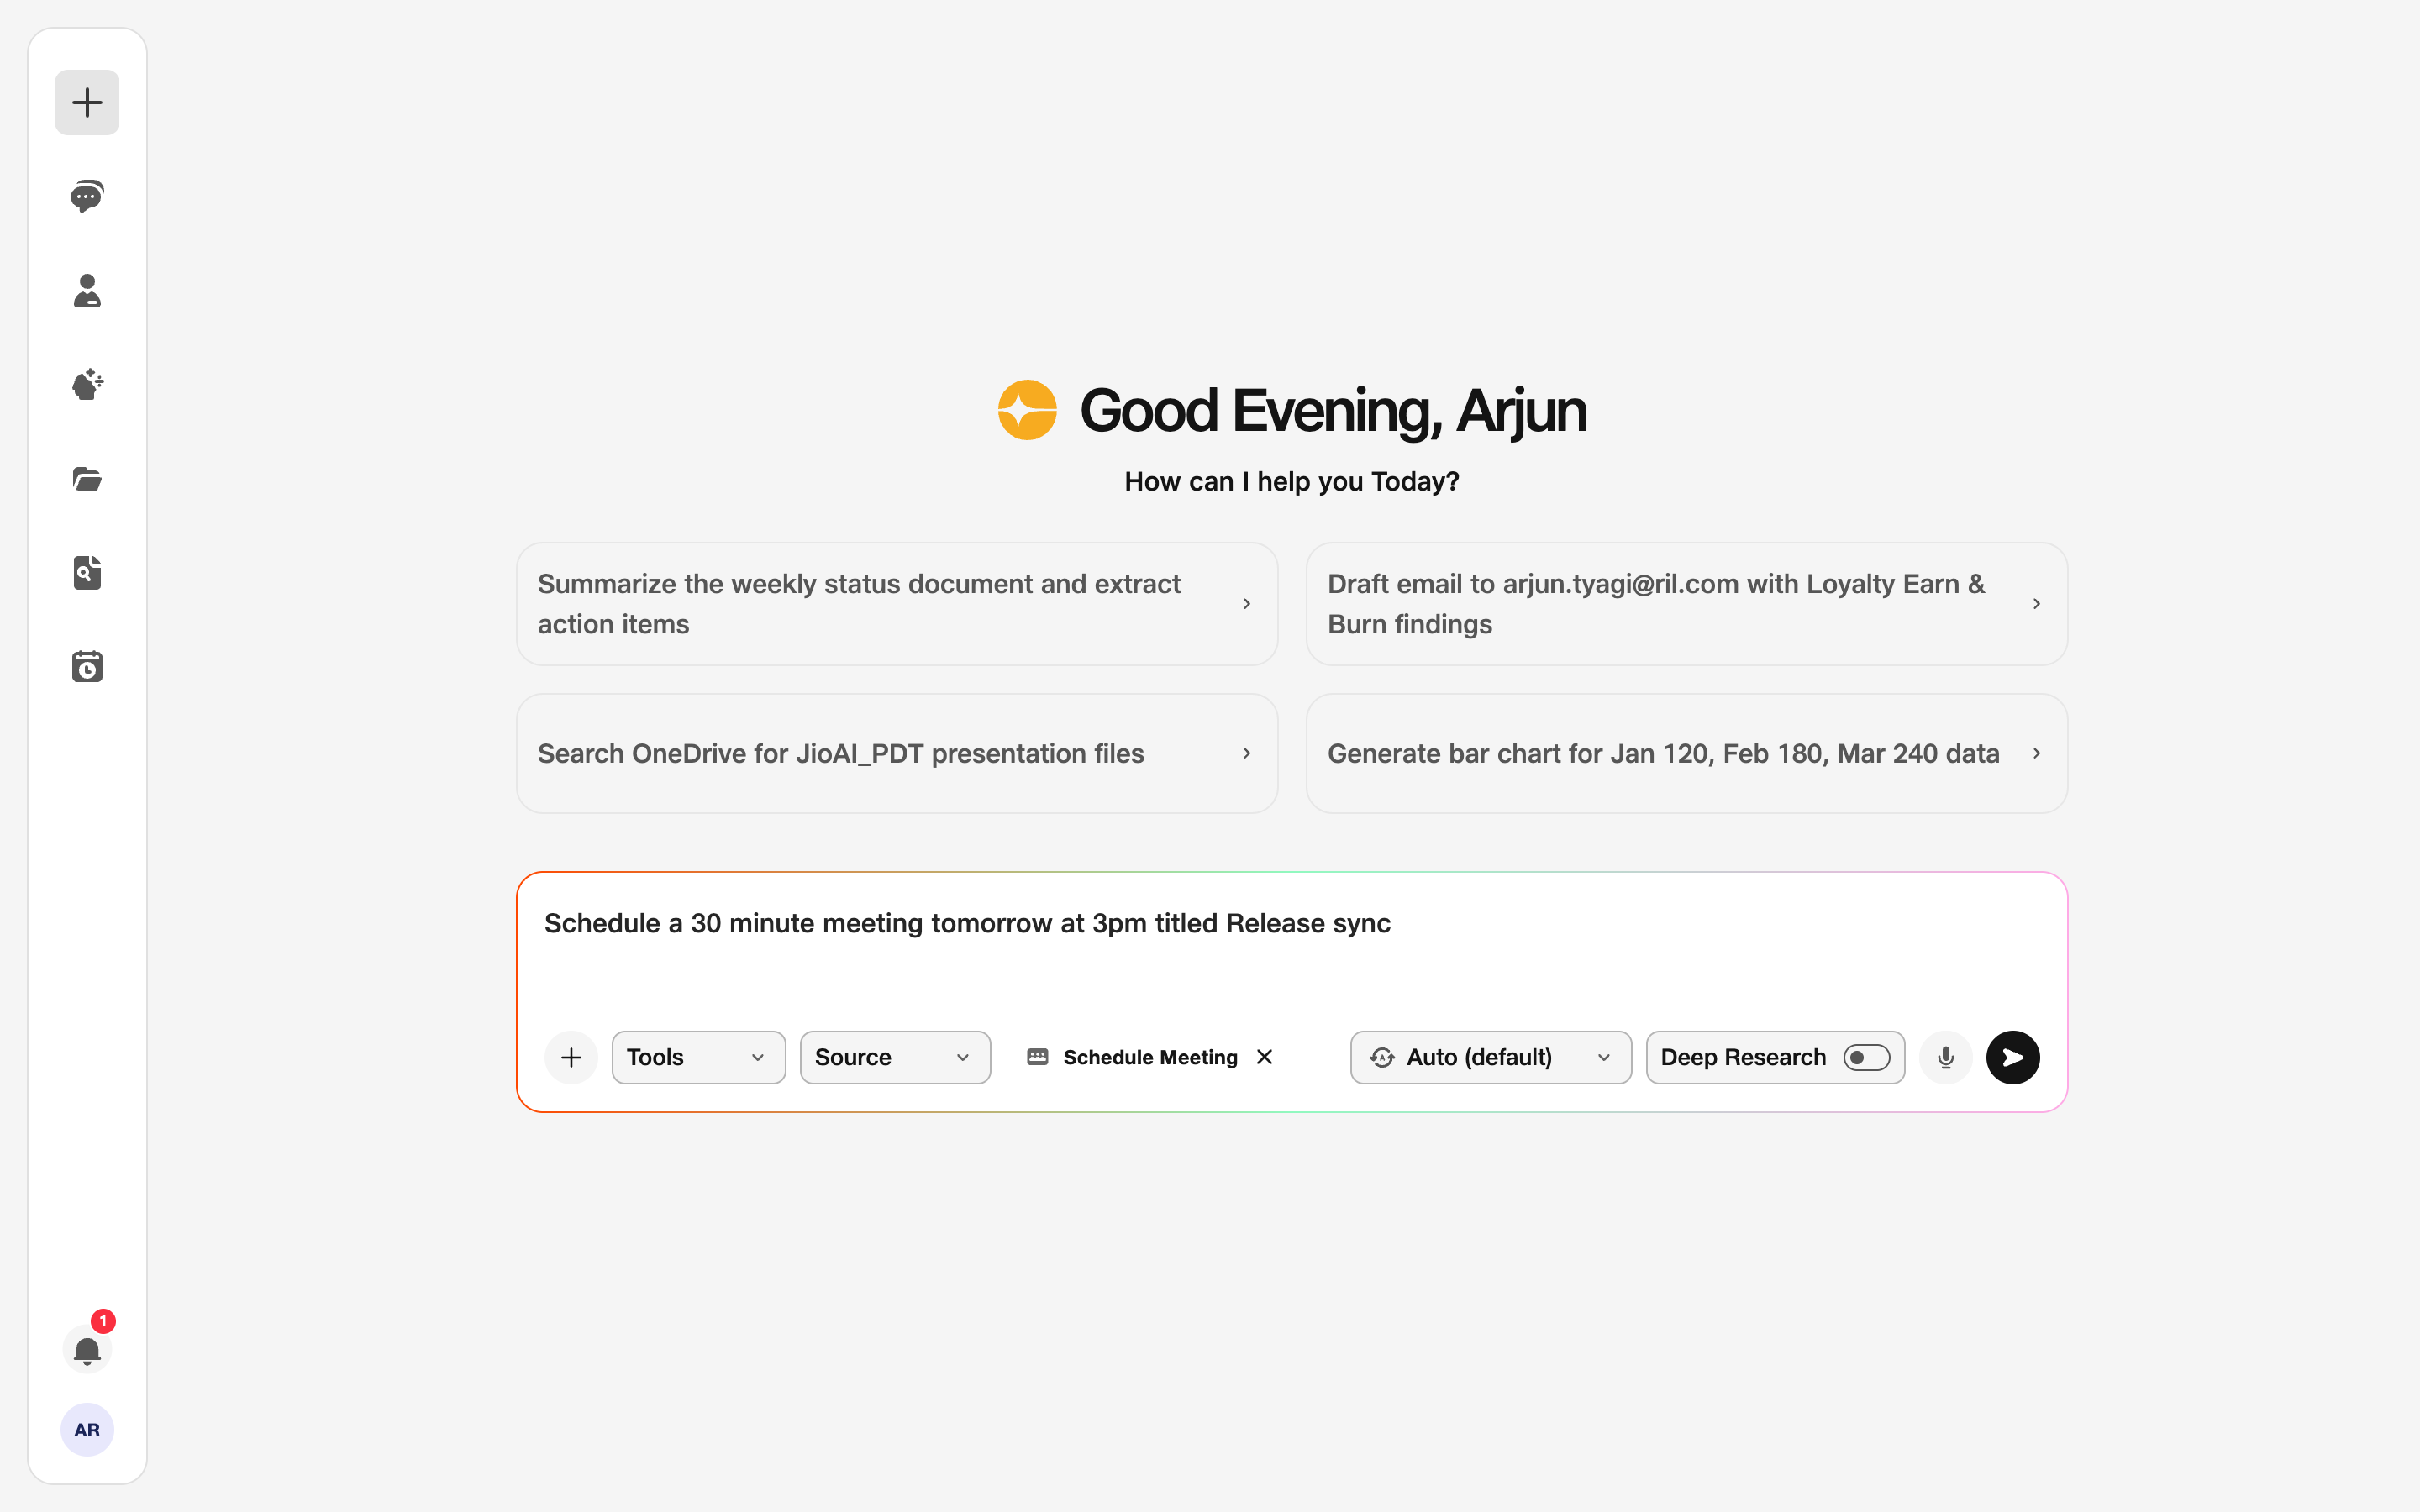
- Tools: Activate Schedule Meeting.
2. Describe the meeting
Type who should attend, when you prefer to meet (or “find a free slot this week”), how long it should run, and what the meeting is about.
Click Send and review what the assistant proposes. Say “move it to Thursday morning” or “add Rahul” if you need changes before you accept the final invite.
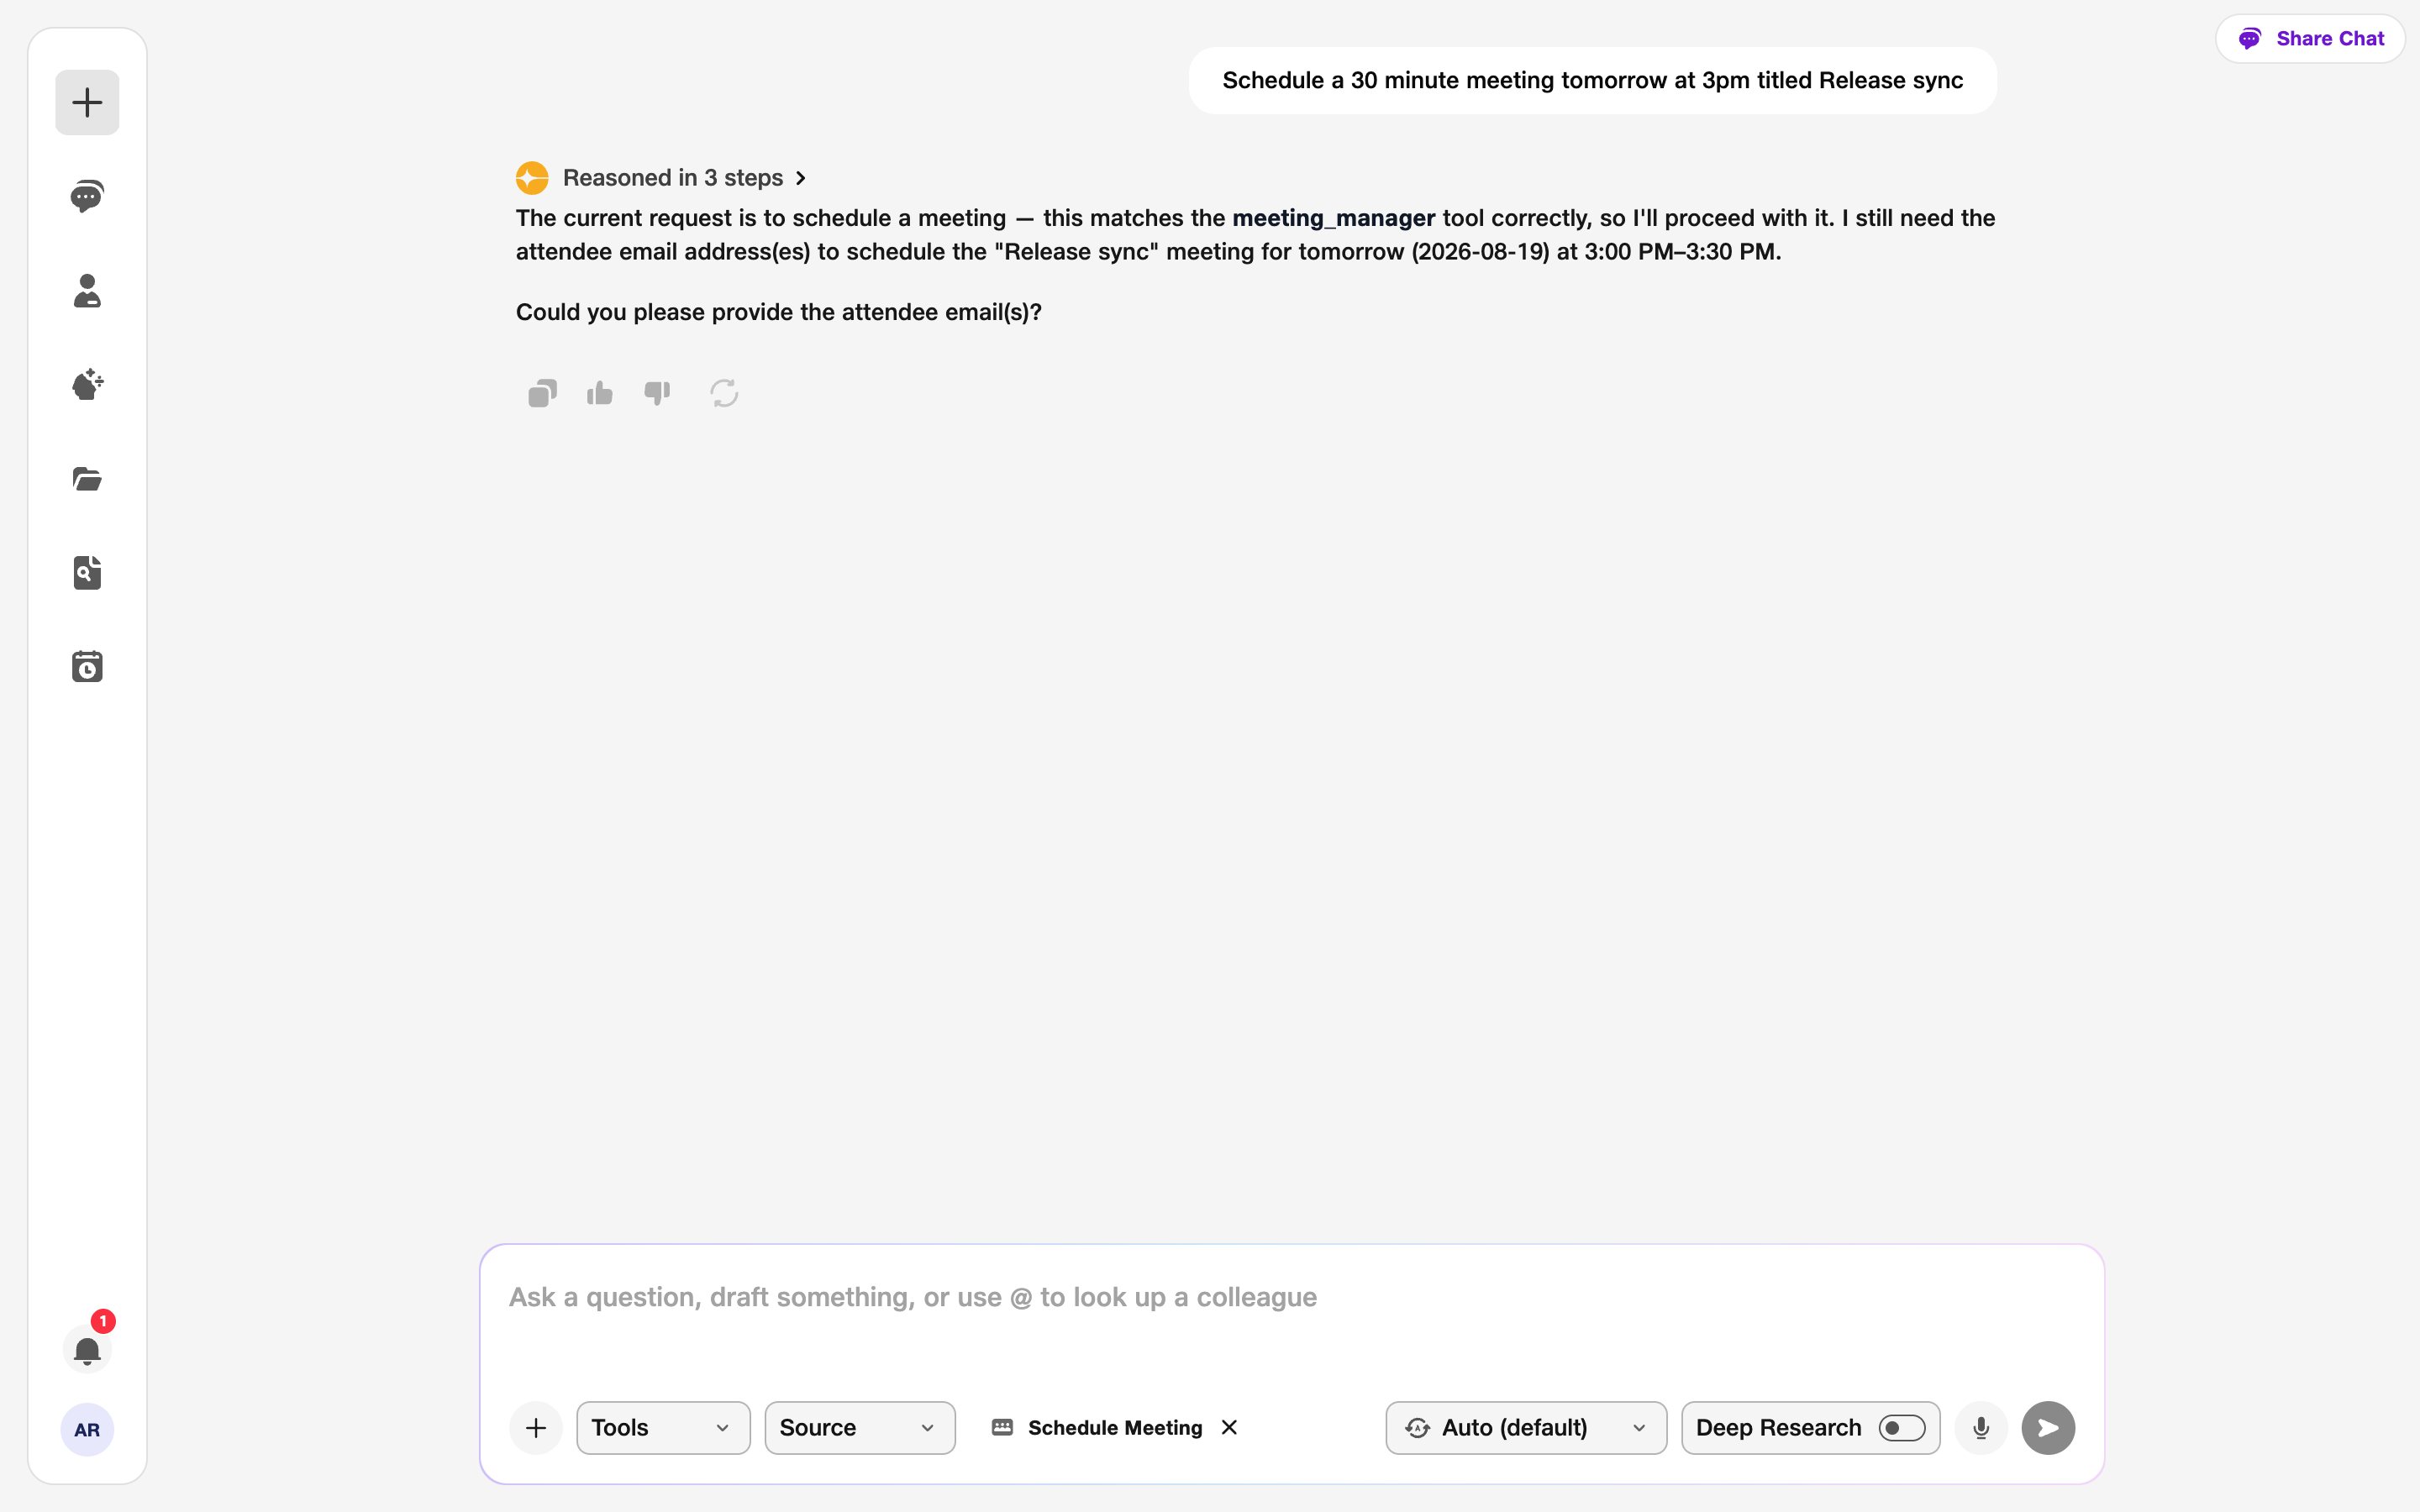
- Details: Who, when, and why.